The real-time forwarder allows for up-to-the-minute monitoring of specific file paths on a given node. This allows you to see changes that occur between regularly scheduled node scans. By default, Cloudhouse Guardian (Guardian) tracks changes to your inventory through scans that run on a predetermined schedule. However, you may wish to monitor certain nodes more closely than the standard point-in-time scans allow. By installing Guardian's real-time forwarder on a node, you can track the node's file changes between scans, meaning you can even view which users or processes caused a change to occur. Once you've installed the real-time forwarder, you can view updates in real time either from the applicable node's Node Scan Results page or from the Events (Control > Events) tab.
Dependencies
Dependencies for Guardian's real-time forward are as follows for Windows and Linux nodes.
Windows
To install the real-time forwarder on a Windows node, you need:
-
A Windows connection manager version 4.8.13 or higher.
-
A node running Windows 2008 R2 or later.
Linux
To install the real-time forwarder on a Linux node, the node must be running one of the following operating systems:
-
Amazon Linux.
-
CentOS 6.
-
CentOS 7.
-
Debian 9.
-
Oracle Linux 6.
-
Oracle Linux 7.
-
RHEL 6.
-
RHEL 7.
-
Ubuntu 14.04.
-
Ubuntu 16.04.
-
Ubuntu 18.04.
Install the Real-Time Forwarder
Depending on a node's type, you may have two options for installing the real-time forwarder: using Microsoft Installer (for Windows nodes) or using Guardian (for Windows or Linux nodes). Each process is outlined in the sections below.
Install Using Microsoft Installer
If you're installing the real-time forwarder on a Windows node you have direct access to, you can do so using a Microsoft Installer file. After downloading, simply run the installer on the node and follow the prompts provided. Once done, initiate a node scan within Guardian to finalize the setup. You can confirm the installation was successful by looking for the RT badge beside your node on the Monitored tab (Inventory > Monitored), as shown below:
![]()
Now, you can proceed to configuring the specific file directories you want to monitor in real time. For more information, see Configure Real-Time Monitored Directories.
Install Using Guardian
If you're installing the real-time forwarder on a Linux node (or a Windows node you don't have direct access to), you can do so remotely from within Guardian. This method is also useful if you want to install the real-time forwarder on an entire node group at once rather than one at a time.
Note: Installing the real-time forwarder using Guardian requires credentials to access selected nodes. Be sure to enter credentials for an account that has root access, such as an administrator or service account. These credentials are only used for the installation and are not stored by Guardian.
To install the real-time forwarder on a node from within Guardian, complete the following process:
-
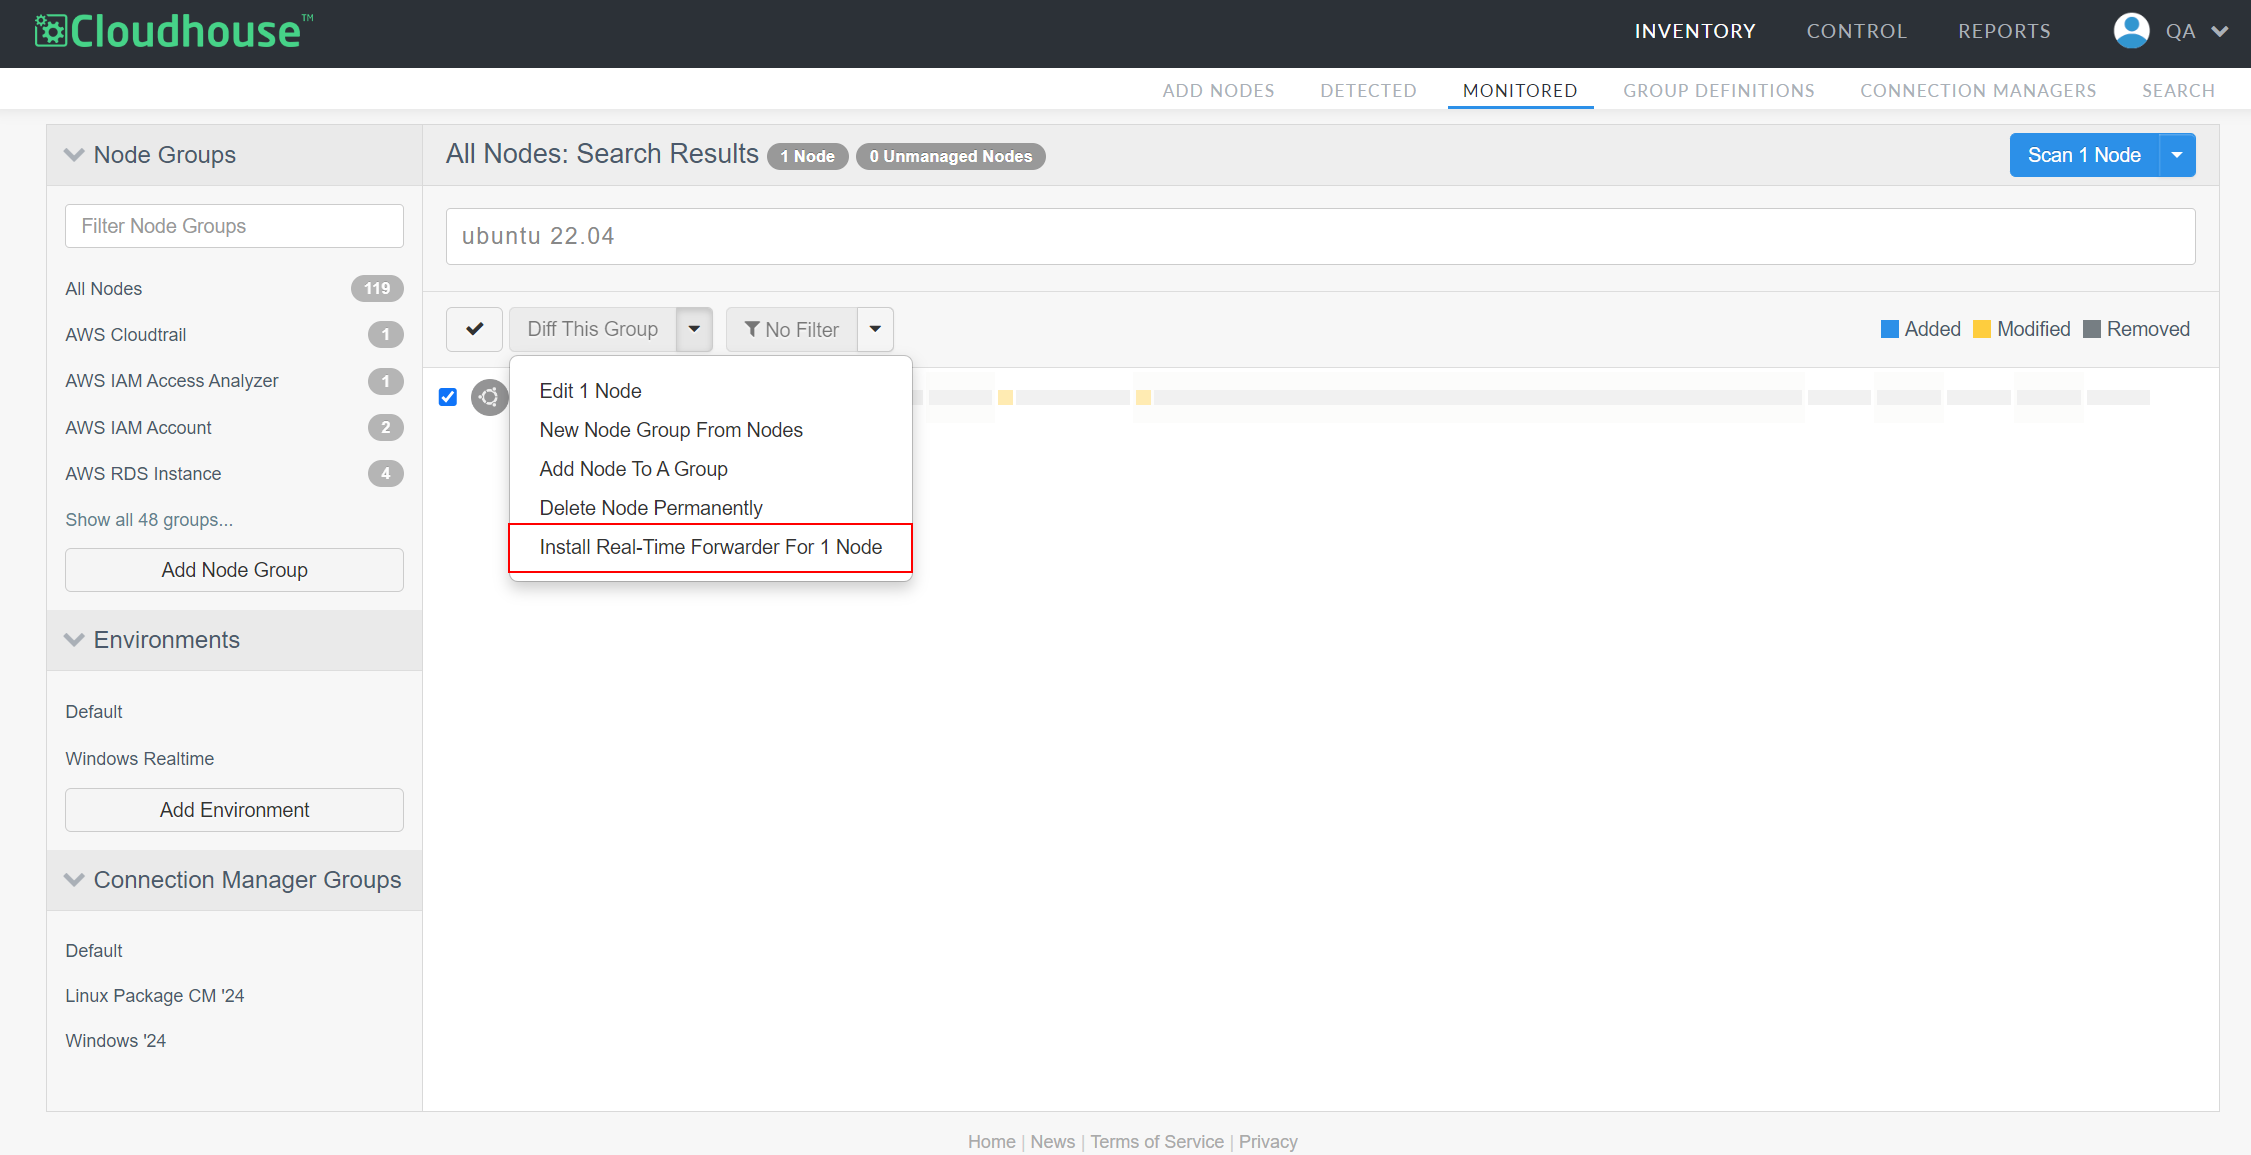
From the Monitored tab, select a node (or nodes) using the checkboxes beside each node's name.
Tip: To install the real-time forwarder on all nodes in a node group, you don't need to select any checkboxes. Instead, proceed directly to the following step.
-
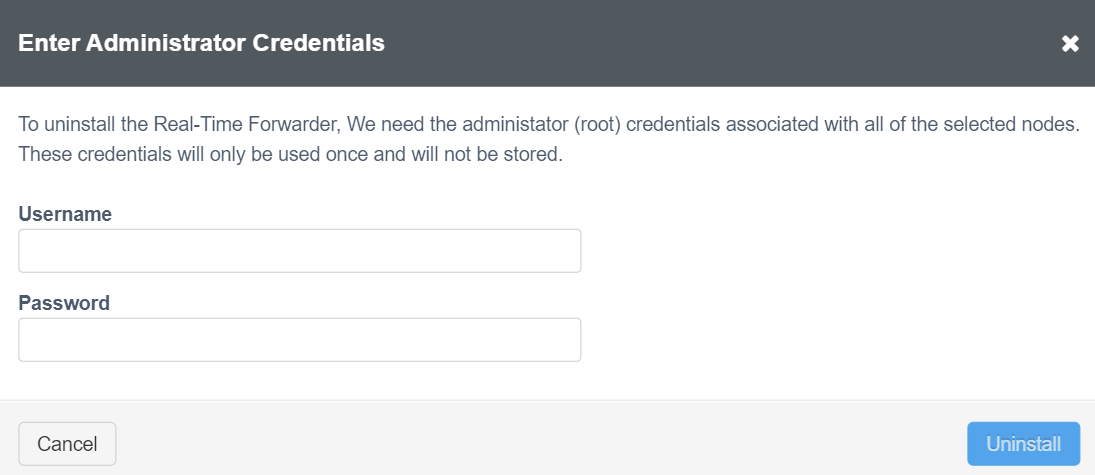
From the Diff This Group drop-down (Diff X Nodes if multiple nodes are selected), select Install Real-Time Forwarder For X Nodes. The Enter Administrator Credentials dialog is displayed.
-
Enter the Username and Password associated with the selected node(s), then click Install.
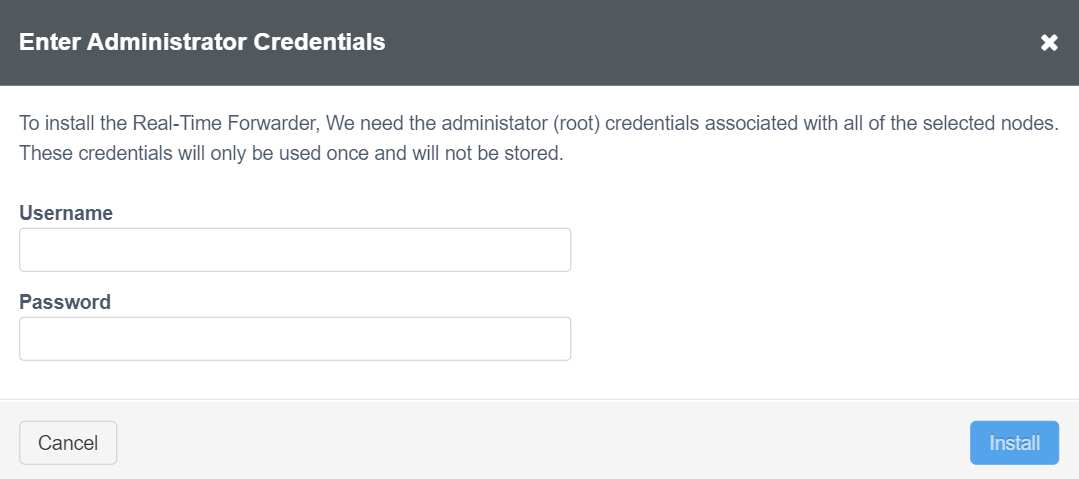
Note: If your provided credentials are only valid for some of the selected nodes, the installation will proceed on the nodes for which the credentials are valid. You will need to repeat the process for any other nodes, providing the correct credentials.
With the above complete, Guardian installs the real-time forwarder on the selected nodes. The Installing Real-Time Driver dialog is displayed, indicating the progress of the installation, but you can also close this to continue working in Guardian. You can view the installation progress again at any time from the Job History tab (Control > Job History). Once the installation is complete, you must trigger a node scan on each of the selected nodes to finalize the installation. Then, you can confirm the installation was successful by looking for the RT badge beside your node on the Monitored tab, as shown below:
![]()
Now, you can proceed to configuring the specific file directories you want to monitor in real time. For more information, see Configure Real-Time Monitored Directories.
Configure Real-Time Monitored Directories
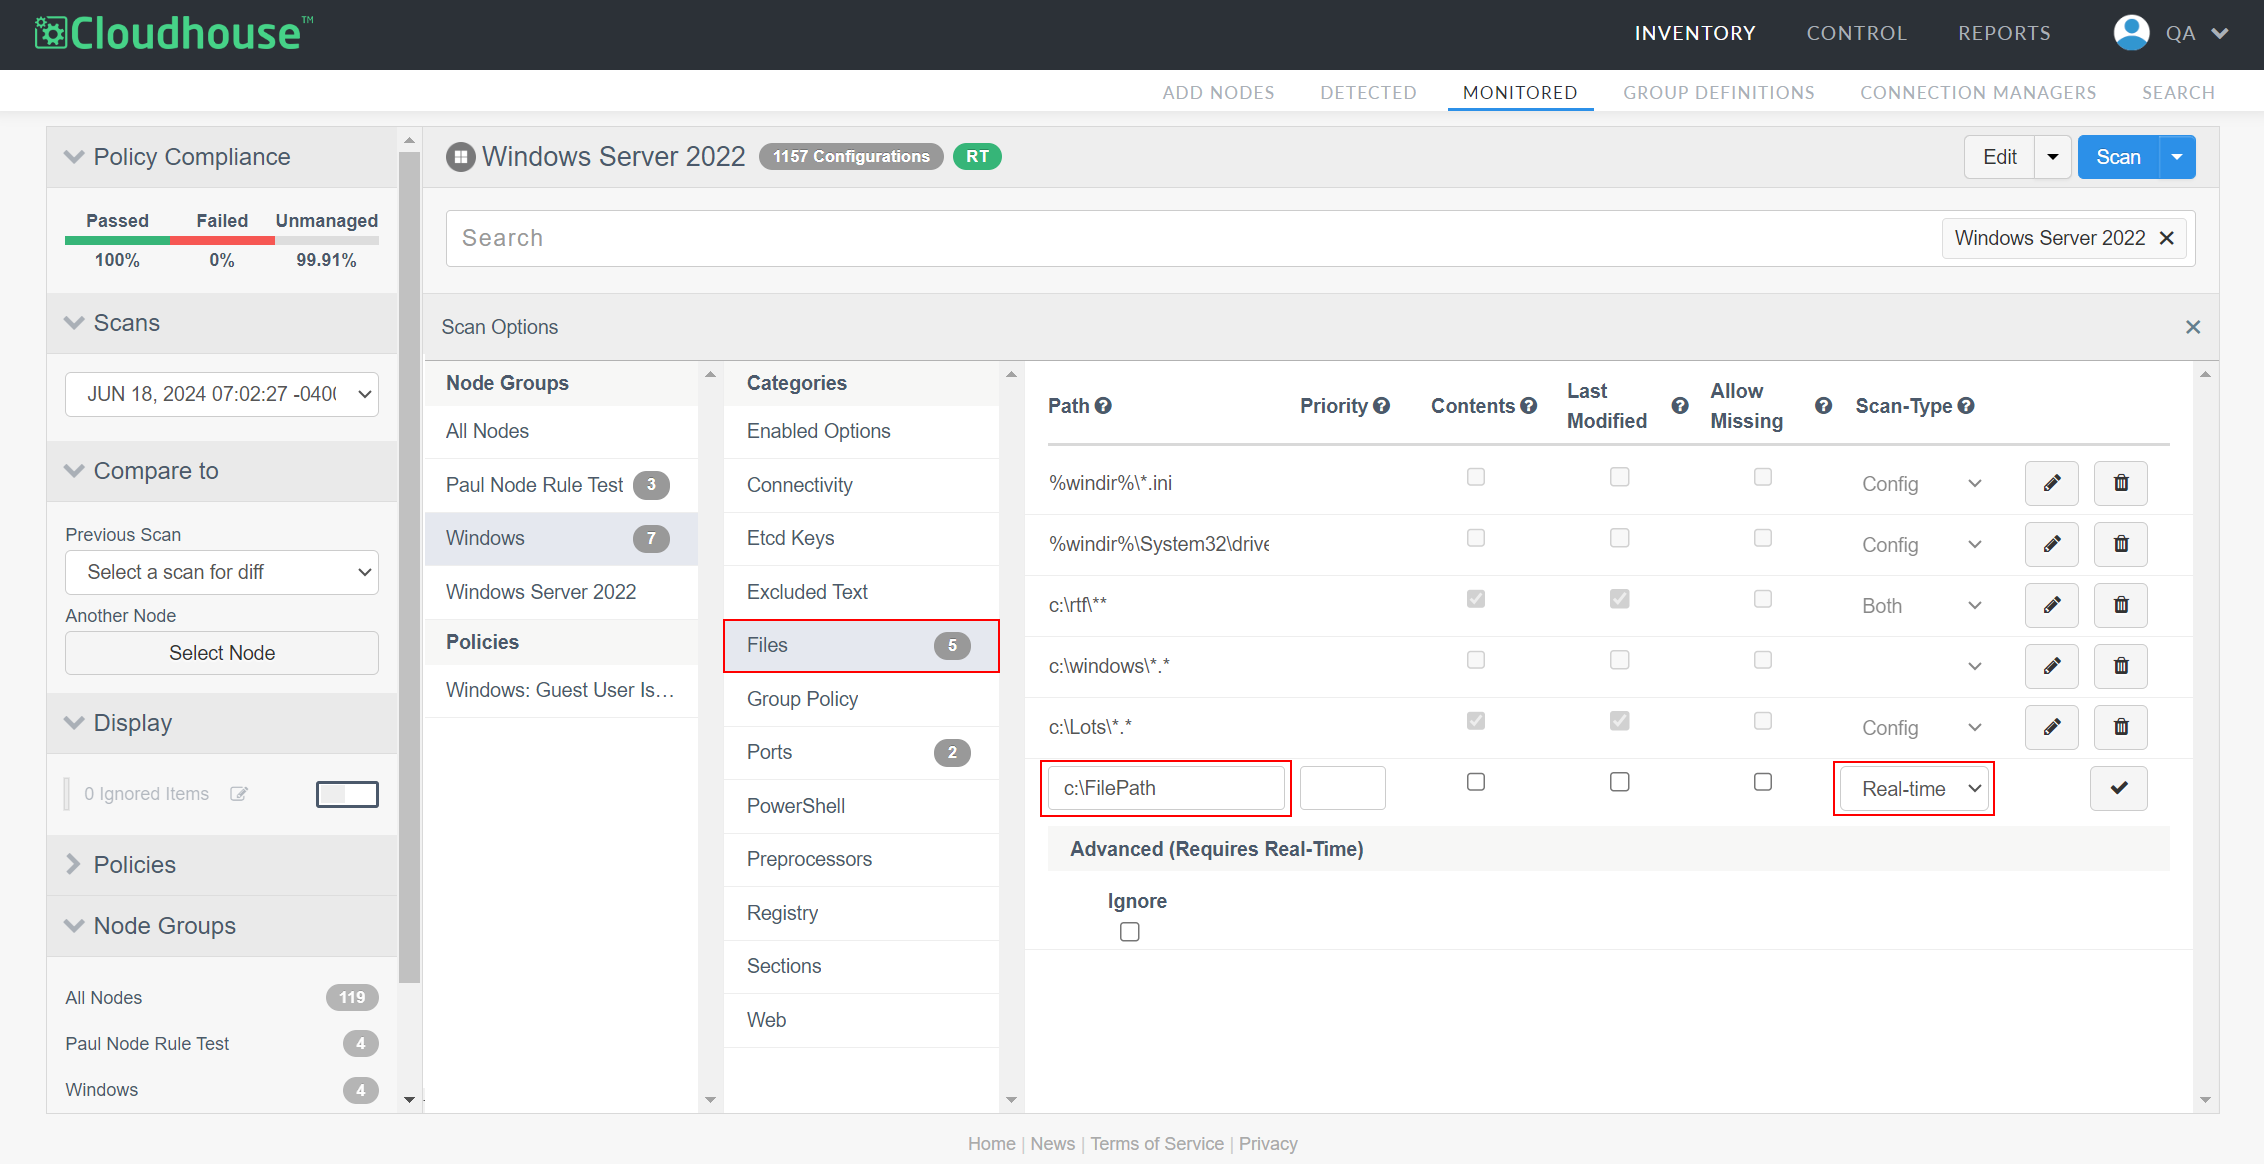
Once you've installed the real-time forwarder on a node, you need to designate the specific file directories for which you want to track real-time changes. You can do this from the Files category on the Scan Options page. Here, when you designate a file path, you can select the Real-time checkbox to let Guardian know that you want real-time date to be collected for this file path.
To configure a real-time monitored directory, complete the following process:
-
In Guardian, navigate to the Monitored tab.
-
Select the node from the list of monitored nodes. The node scan results page is displayed. For more information, see Node Scan Results.
-
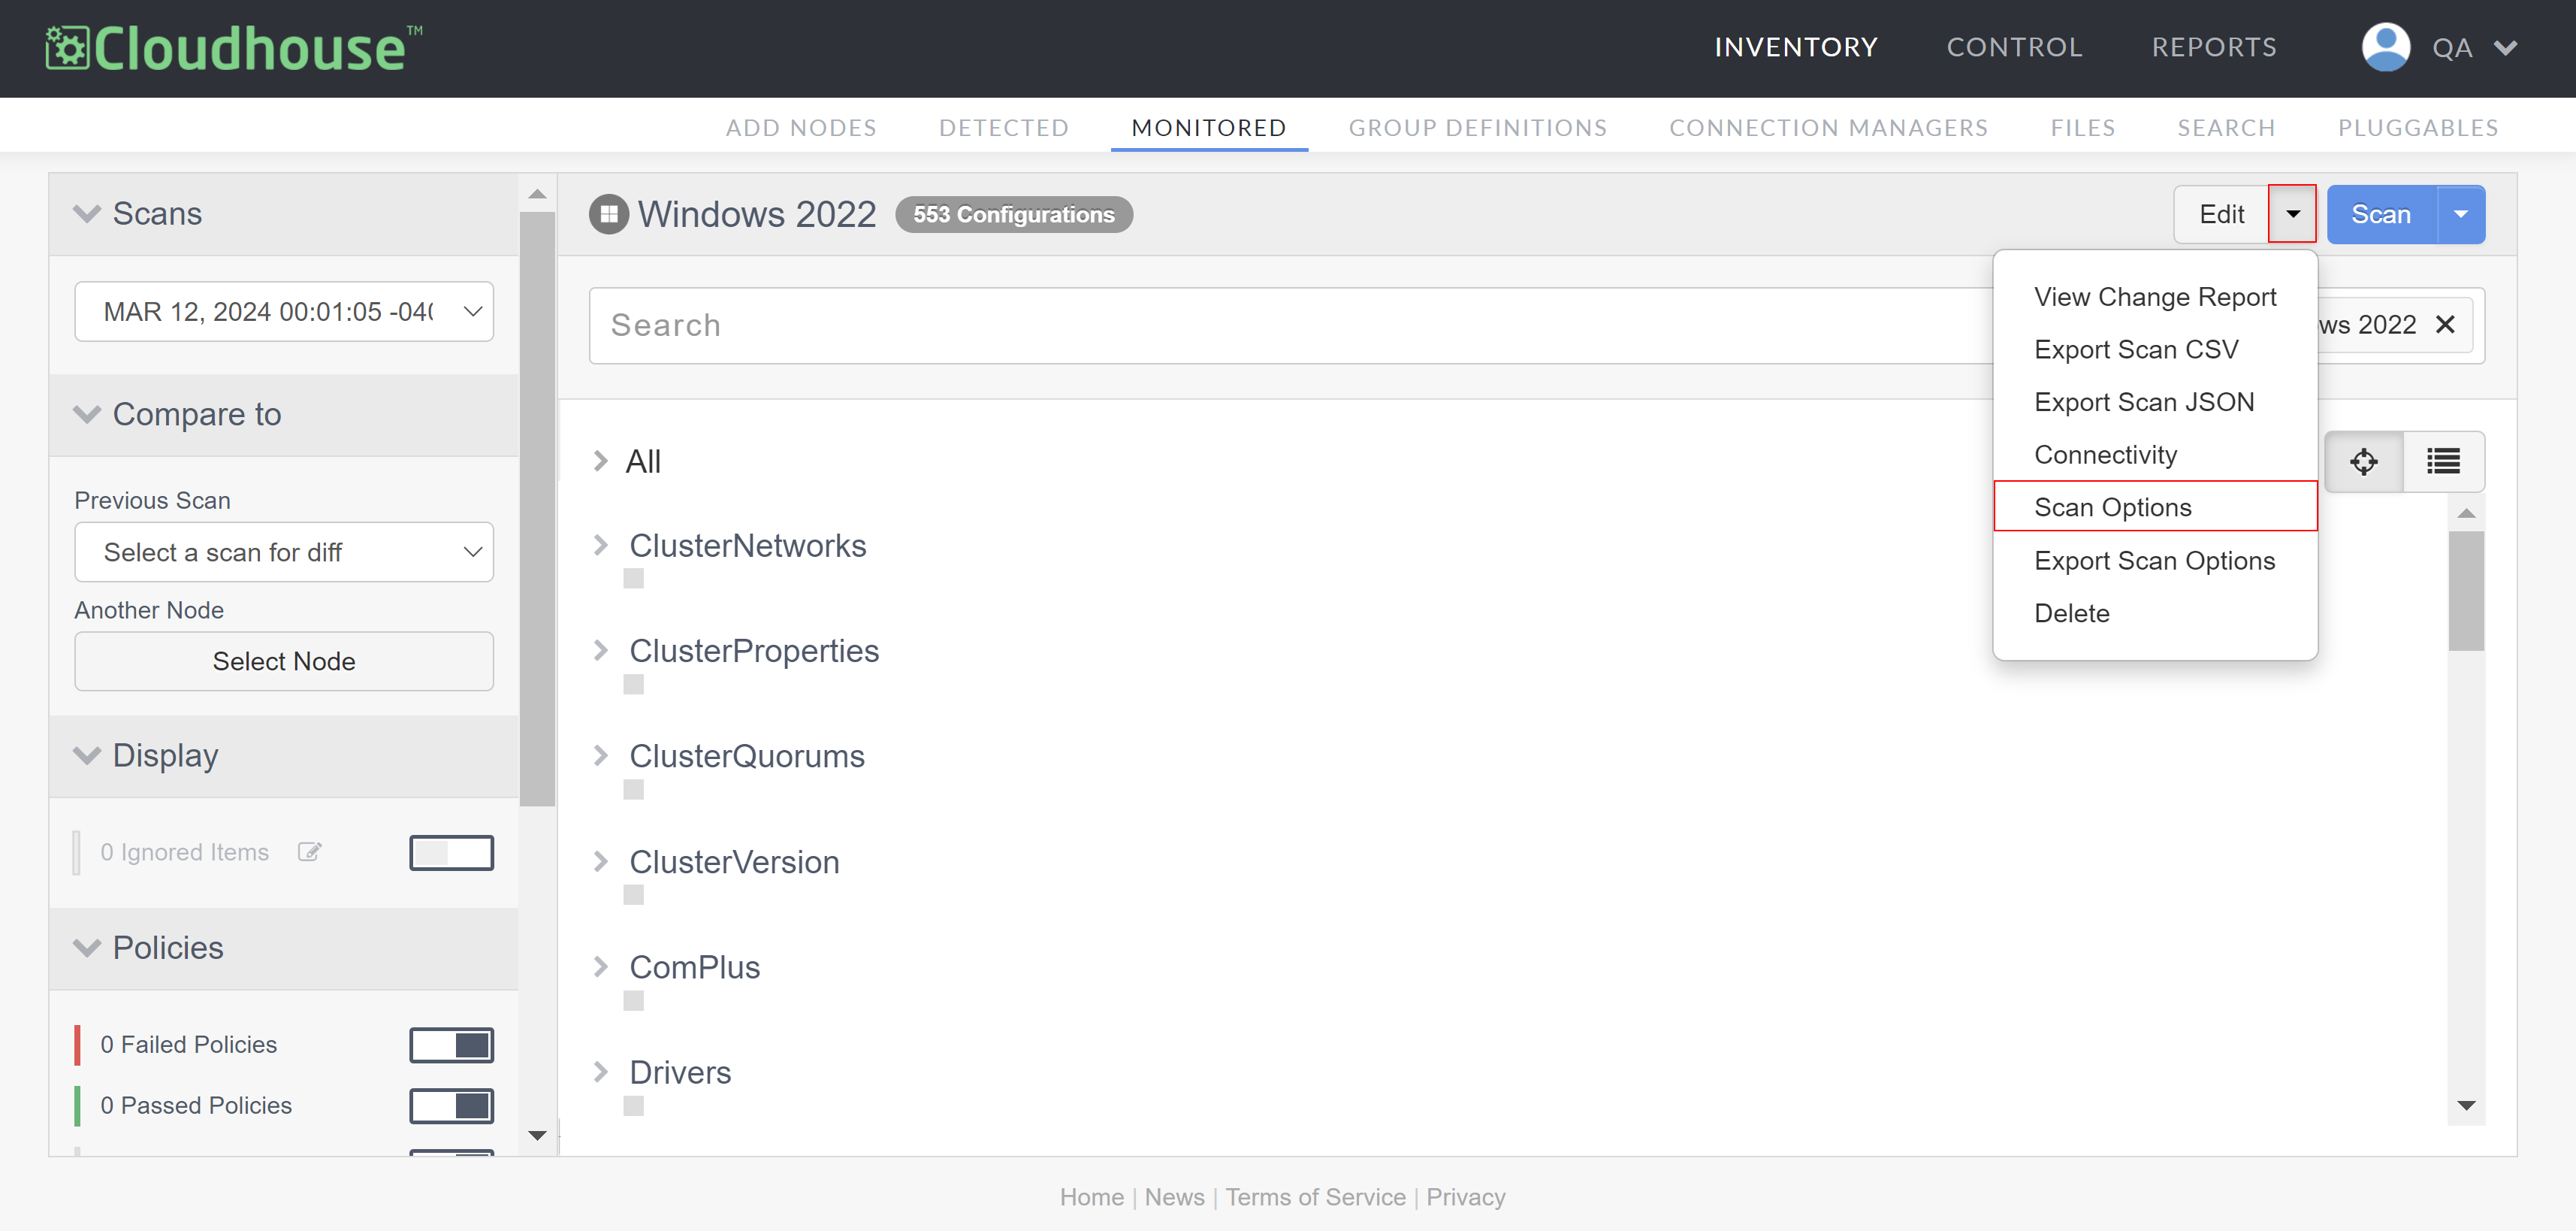
Click the Edit drop-down and select Scan Options. The Scan Options page is displayed.
-
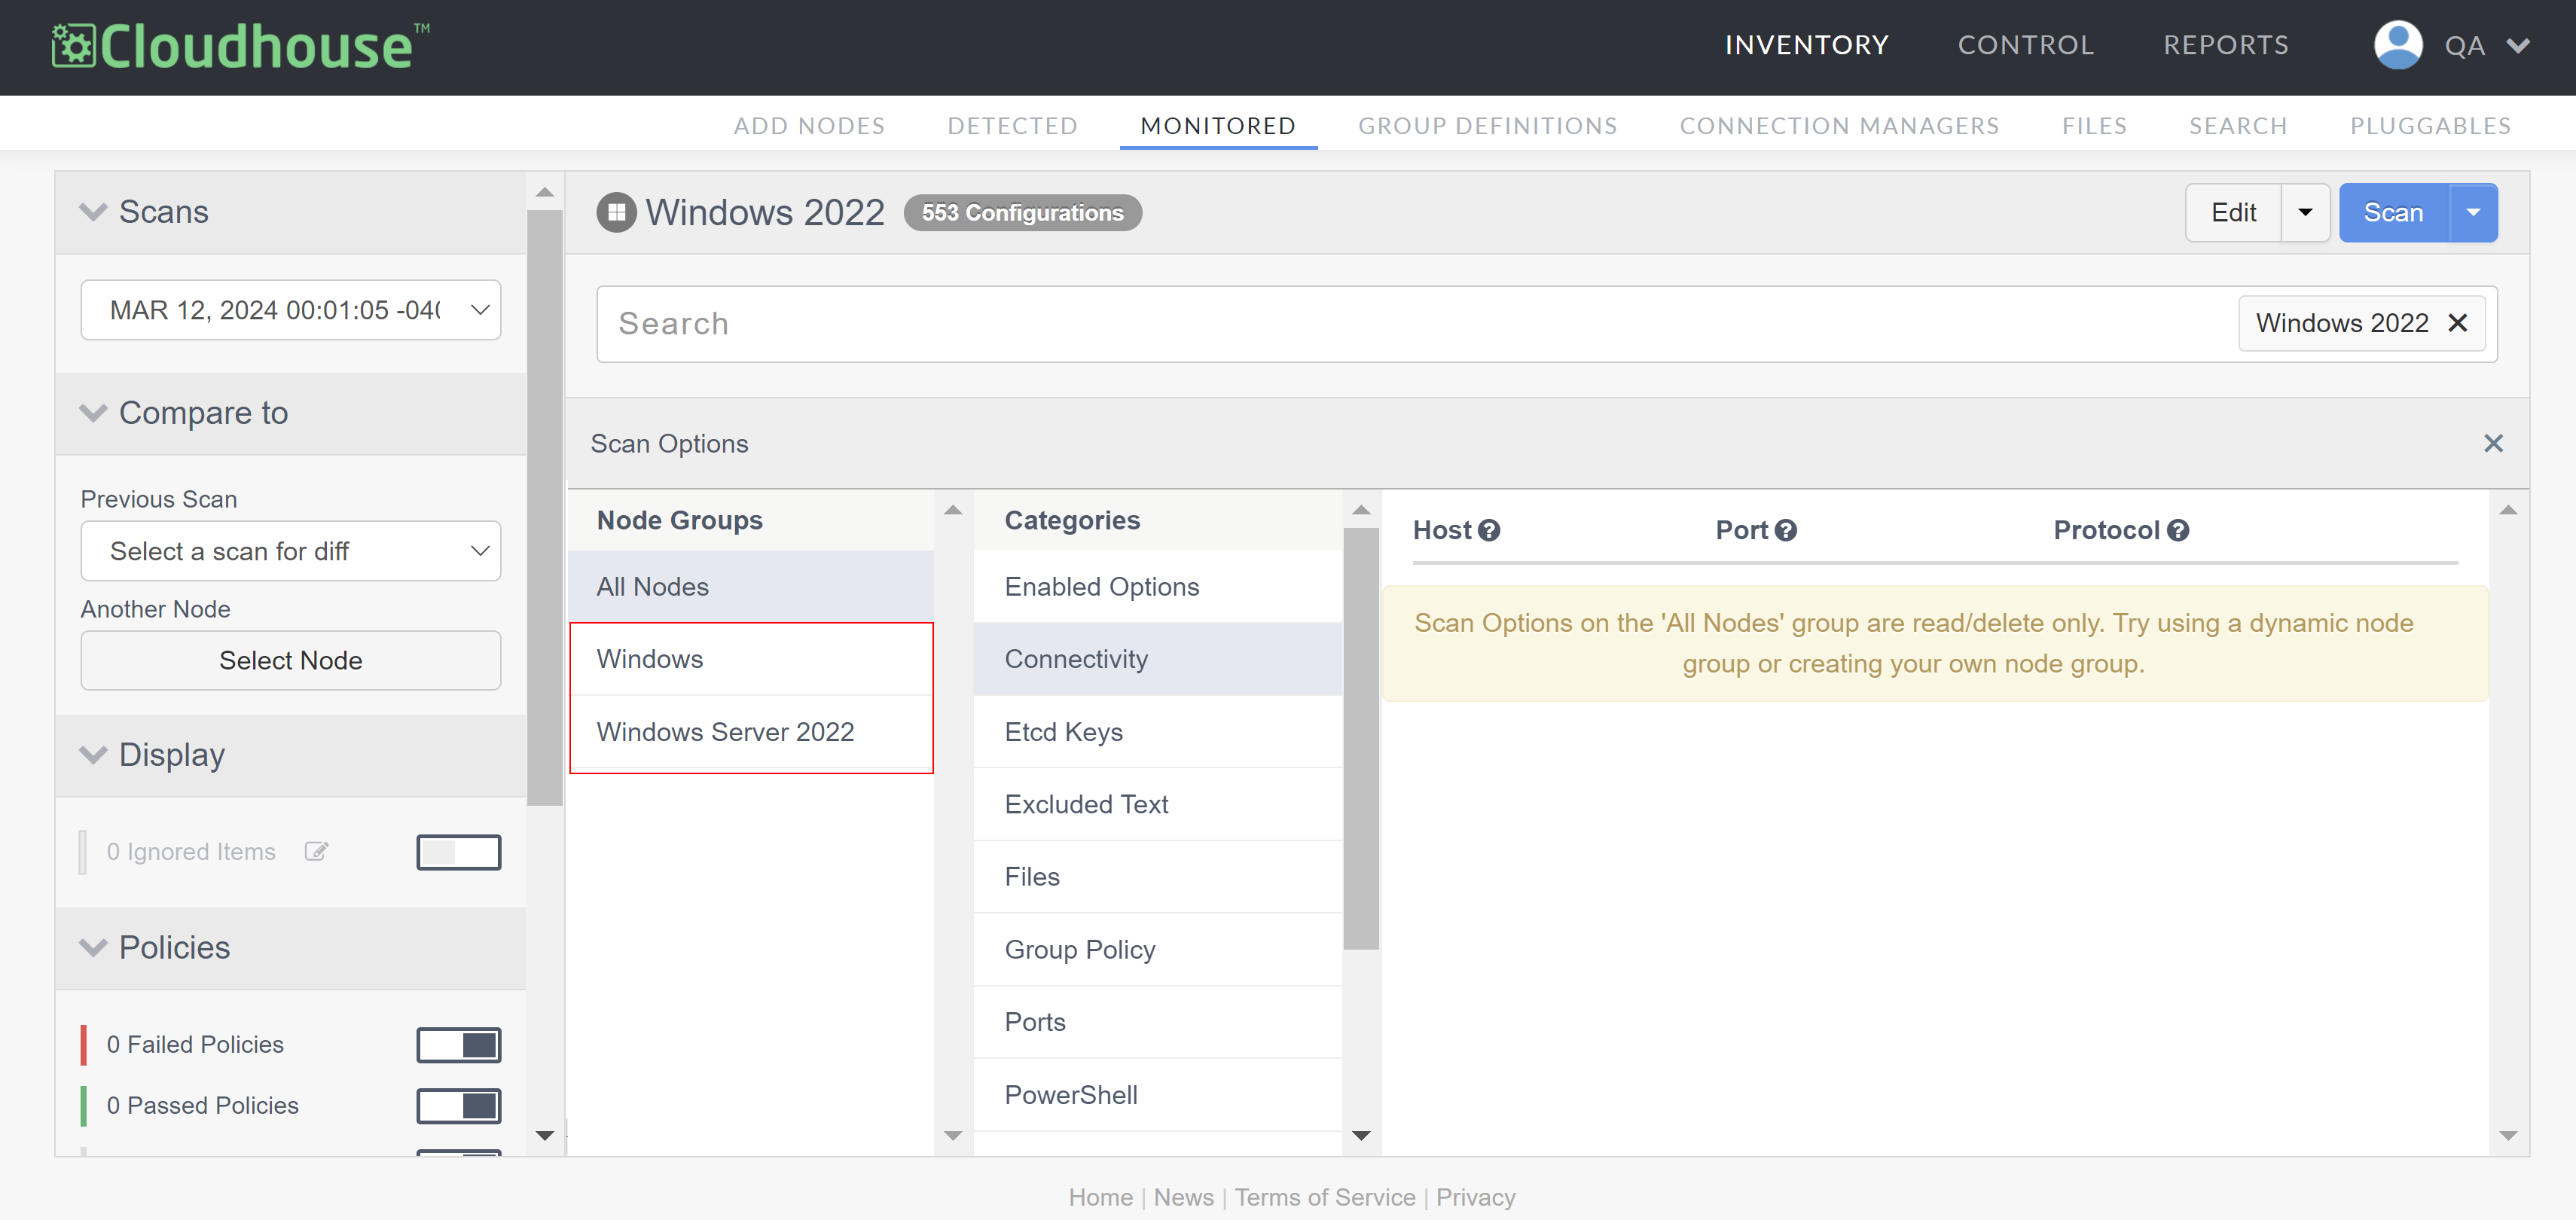
Select the node group you want to apply the scan options to from the list of Node Groups.
Warning: By default, the 'All Nodes' node group is displayed. However, scan options on the 'All Nodes' node group are not available to edit. Select a different node group to edit the corresponding scan options.
-
Select the Files category.
-
Enter a Path. This can be an absolute path or a syntax-based bath. For more information, see Syntax Rules.
-
From the Scan-Type drop-down, select 'Real-time' to include this path in real-time data collection.
-
Click the Checkmark button (
 ) to save your changes.
Now, you'll be able to view each change that is made to the specified path rather than simply the state of the file at the time of a node scan. If the path you entered was not absolute and there are individual files you want excluded from these real-time updates, you can add those as another path on the Scan Options page and select Ignore under Advanced. When Ignore is selected, this specific path will be ignored even if it would otherwise be included under a previously defined path with Real-time enabled.
Note: For more information on how to further customize the scans of your node groups, see Scan Options.
View Real-Time Changes
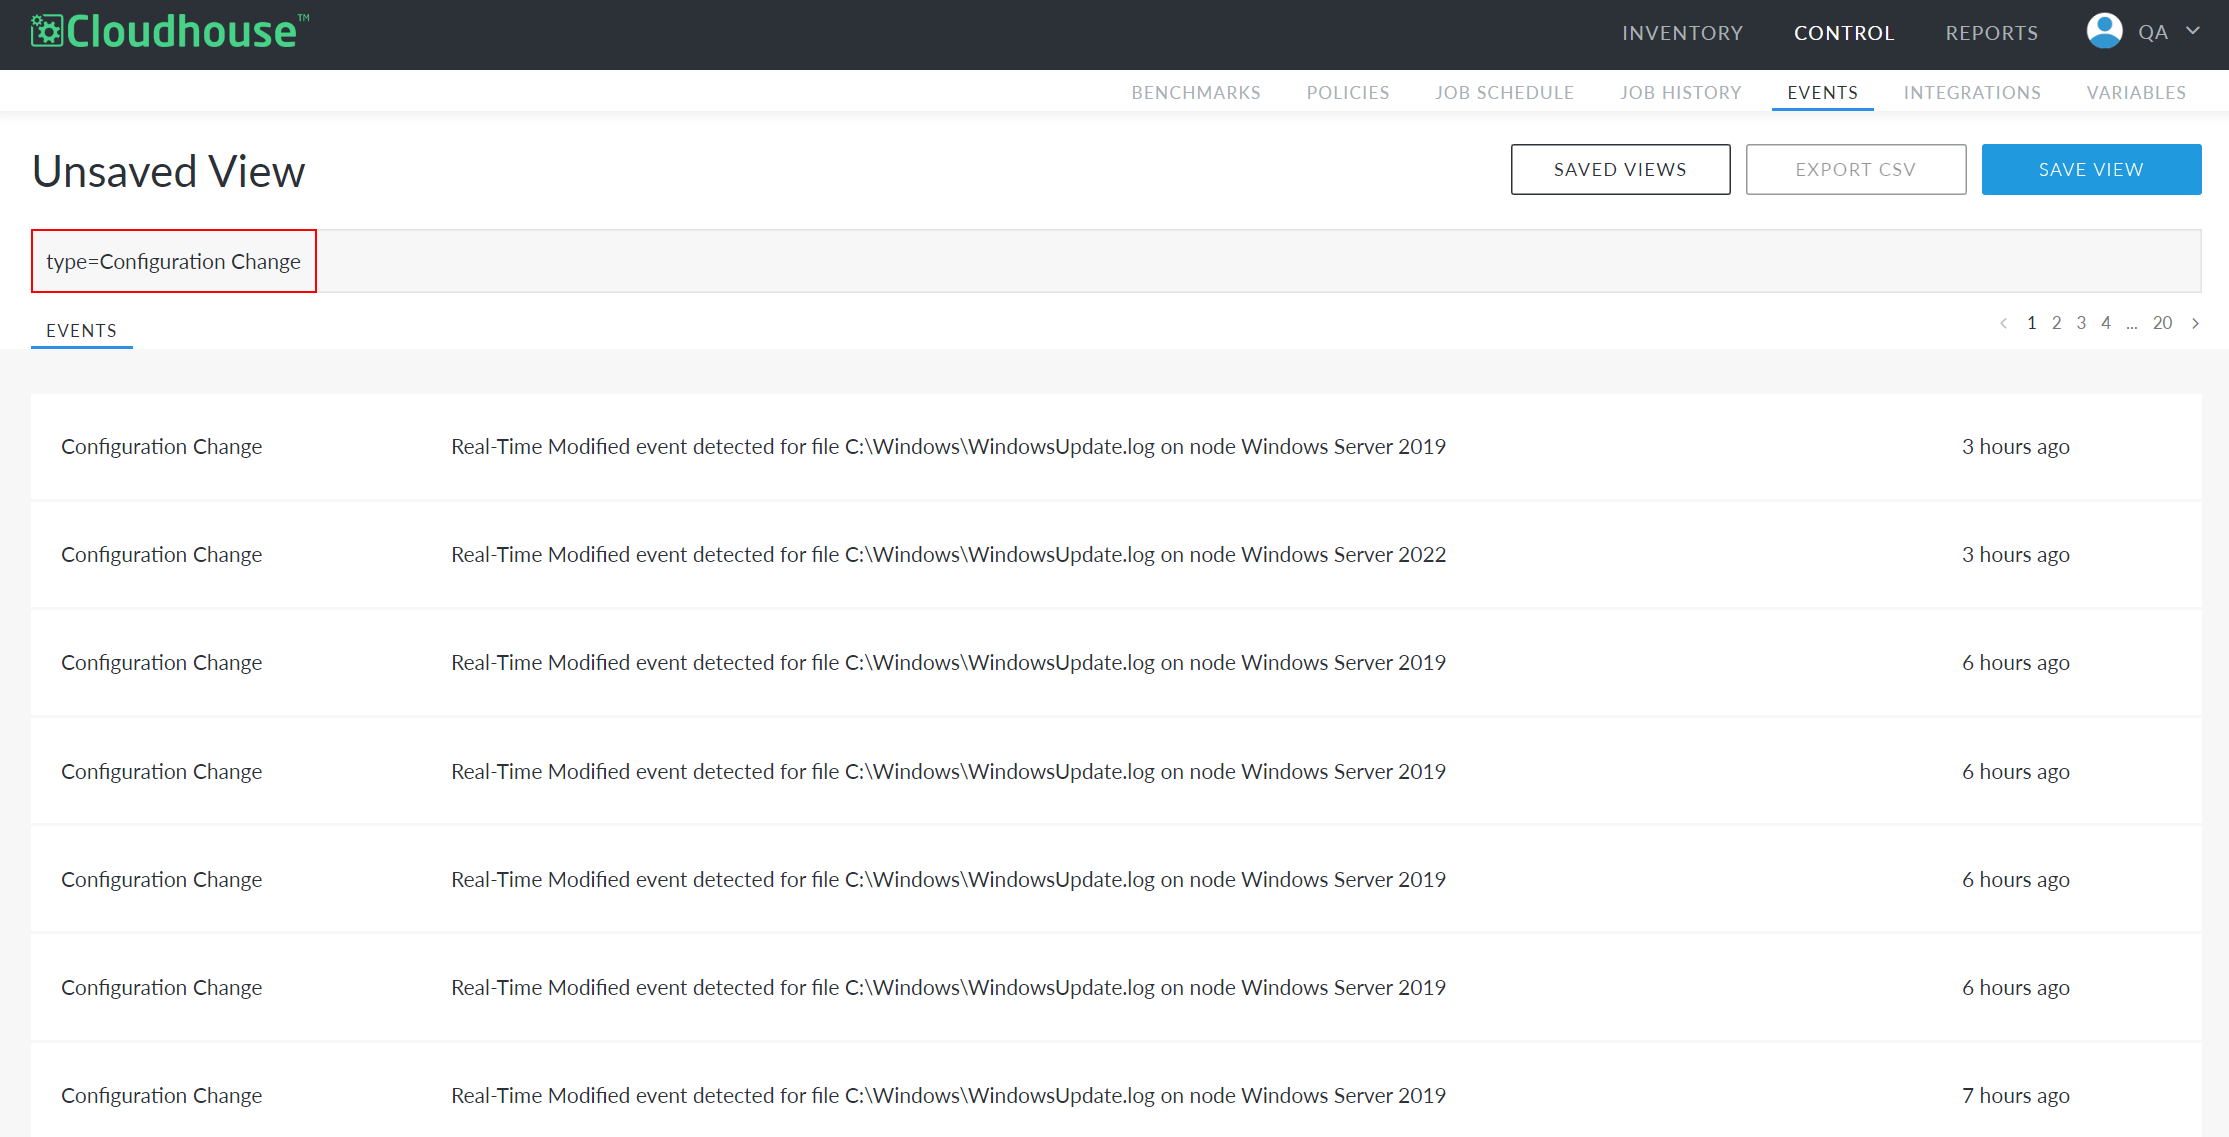
Real-time file changes can be viewed under the 'Configuration Change' Guardian event type. So, you can view these from the Events tab. There, you can filter the results to find exactly the changes you're looking for, including what time the file was changed, who changed the file, and more.
Note: By default, real-time file changes are only viewable from the Guardian Events tab. If you want to display these changes on a node's visualization, you must include a duplicate Path entry on the Scan Options page that does not have the Real-time option selected. This will indicate to Guardian that you want this path displayed on a node's visualization as normal, in which case Guardian will also display the real-time changes directly on the visualization. However, keep in mind that real-time changes can be numerous, and including them on a node's visualization may result in a cluttered view.
To view real-time changes on the Events tab, complete the following process:
-
From the Events tab, enter 'type=Configuration Change' in the search box. The page updates to display all configuration changes within your inventory.
-
To filter configuration changes, enter an additional parameter in the search box using the syntax 'parameter=value'. Some useful parameters you can use are:
-
'path': Displays the changes made to a specific file.
-
'process_name': Displays the changes made by a specific process.
-
'username': Displays the changes made by a specific user.
-
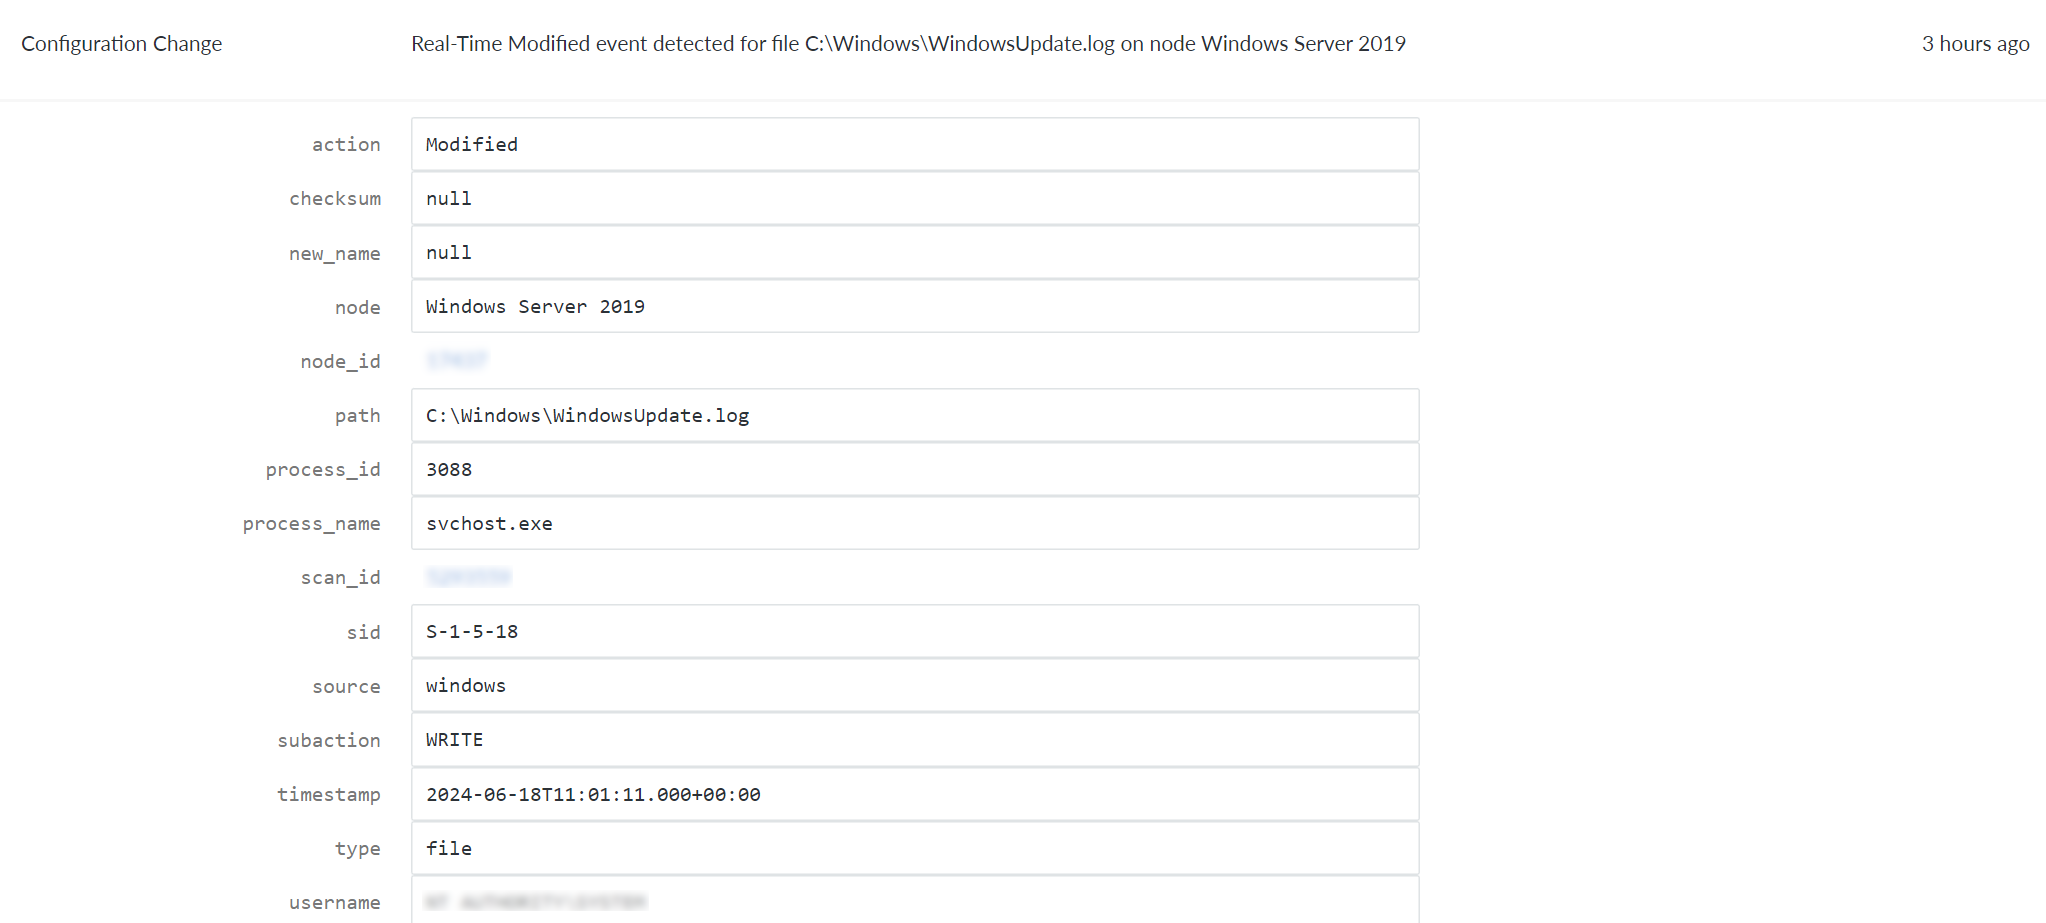
Once you've filtered down to the relevant changes, you can click any change to view its details. In the detailed view, you'll find information like the time the change was made, the name of the user who made the change, and more.
Uninstall the Real-Time Forwarder
While you can always update the monitored paths for a given node or node group using the Scan Options page, you may also wish to stop tracking real-time data for a particular node altogether. To do that, you can uninstall the real-time forwarder from the node. On Windows nodes, you can uninstall the real-time forwarder from the device using the Programs and Features system settings. For Linux nodes or for Windows nodes you don't have direct access to, you can uninstall the forwarder from within Guardian.
To uninstall the real-time forwarder from within Guardian, complete the following process:
-
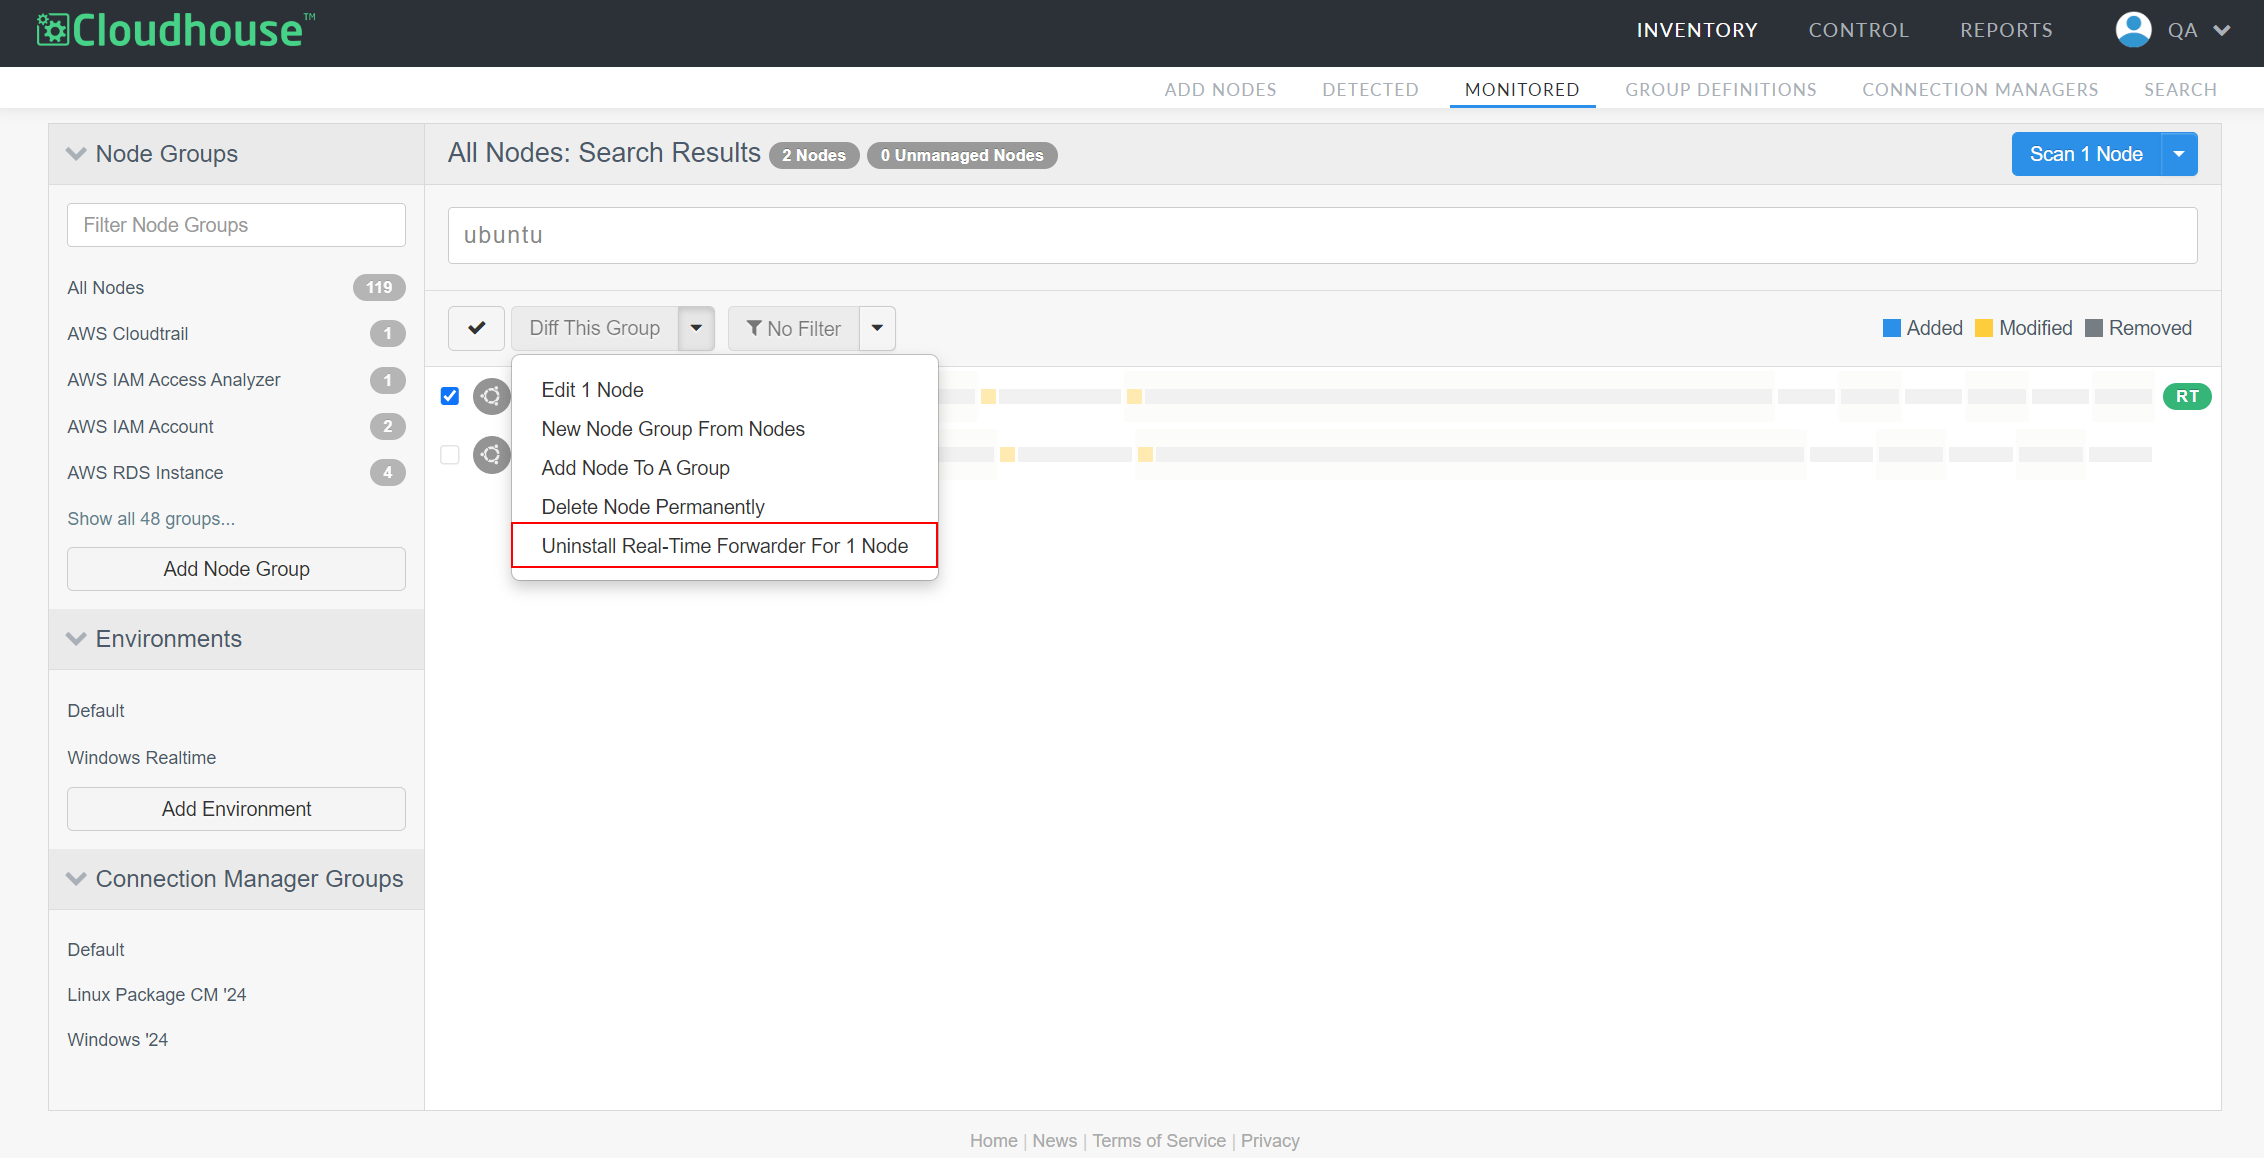
From the Monitored tab, select a node (or nodes) using the checkboxes beside each node's name.
-
From the Diff This Group drop-down (Diff X Nodes if multiple nodes are selected), select Uninstall Real-Time Forwarder For X Nodes. The Enter Administrator Credentials dialog is displayed.
-
Enter the Username and Password associated with the selected node(s), then click Uninstall.
Note: If your provided credentials are only valid for some of the selected nodes, the process will proceed on the nodes for which the credentials are valid. You will need to repeat the process for any other nodes, providing the correct credentials.
Now, the real-time forwarder is uninstalled from the selected nodes. If you wish to reinstall it at any time, you can do so following the steps in Install the Real-Time Forwarder.
Troubleshoot the Real-Time Forwarder
If at any time you receive errors that directly reference the real-time forwarder, you can contact Guardian support for help finding a resolution. However, there are a couple of common errors that can be resolved quickly on your end. See below for more details on each error and how to correct them.
unknown process def: install_fim
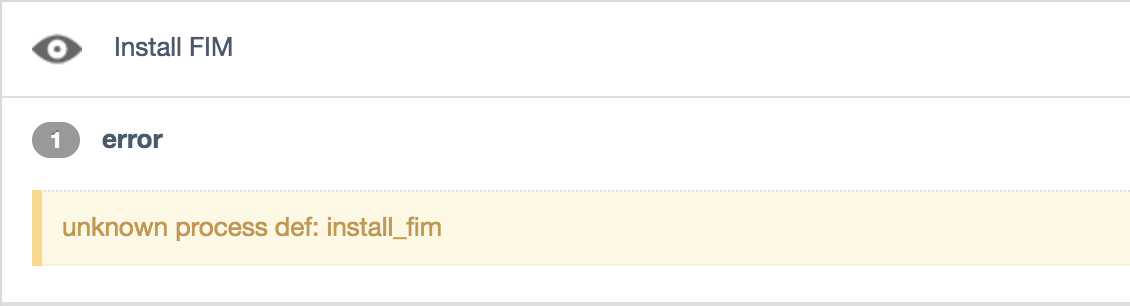
The above error indicates that you have attempted to install the forwarder on an unsupported node (with a node type other than Windows or Linux) or a node running an unsupported version of the Connection Manager. To resolve the issue, ensure you have selected either a Windows or Linux node and that the node is running the most up-to-date Connection Manager available.
Error loading filter library
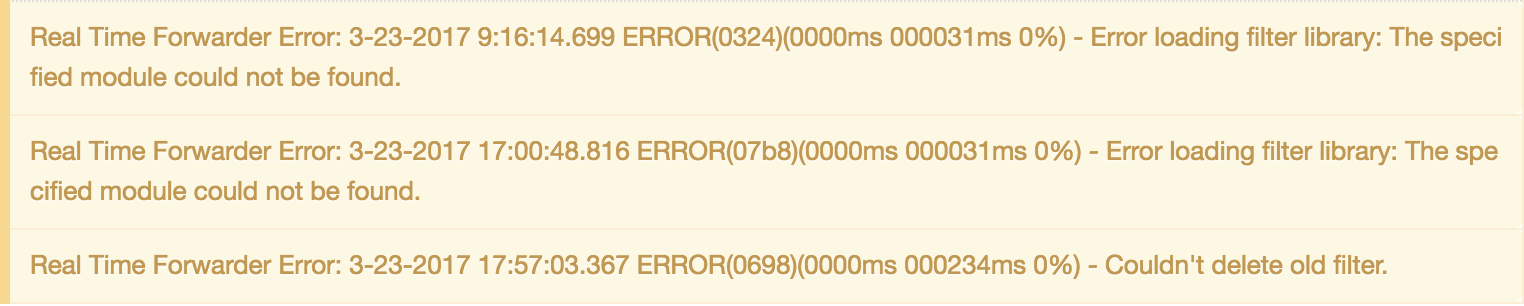
The above error indicates the node's Connection Manager was unable to update the filter options associated with a particular file path. To resolve the issue, confirm the forwarder is running on the node by assessing other file paths you've specified to be monitored. If the forwarder is not running, restart the node. If the issue persists, contact Guardian support for assistance.